Sunday, December 30, 2012

Christmas Recap

We've been MIA for a week now, but only on the blog here. The action hasn't stopped in real life. The holiday went kind of like this...

Sunday: Christmas at my mom-mom's with my mom's side of the family.
Monday (Christmas Eve): Christmas with Keith's parents and brother.
Tuesday (Christmas): Real Christmas. Finally. At home, and my parents, brother and niece came to visit for awhile.
Wednesday - Friday: Bert and I went up to my parents' to hang out with said parents, brother and niece while Keith went to work. We gathered with my dad's side of the family Wednesday evening.

And now we are home, with some low-key New Year's celebrations ahead of us (I'm really looking forward to the balloon-drop "midnight" at a friend's house early tomorrow evening and snacking into the night back at home). Then we will do pork and sauerkraut with Keith's parents and extended family on New Year's Day and the holidays will officially be a wrap.

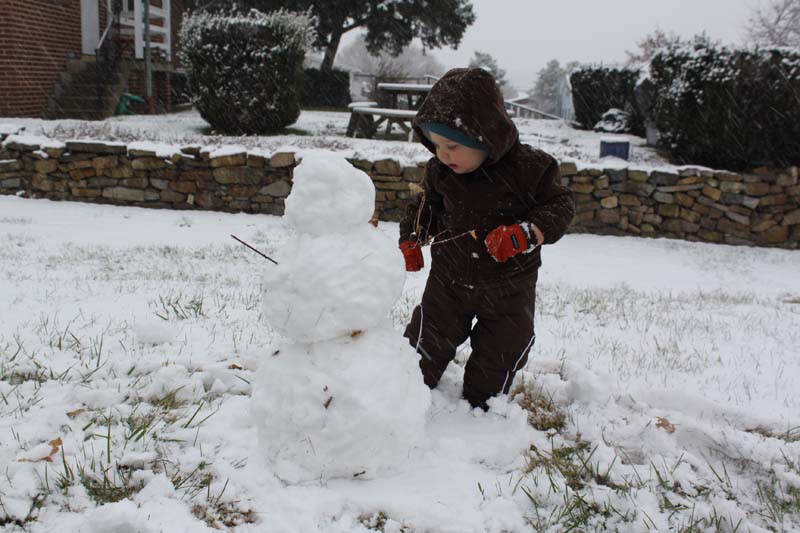
Since looking at photos are so much more fun than reading about it, here's a few. I didn't take that many; I'm finding that holidays and other gatherings are so much more fun without a camera in front of my face. So mostly I snap a few (if I have even remembered the camera) and then put it away and enjoy myself. Live in the moment and all that.

This is for P and Shell...


I love a white Christmas! Didn't Mr. Griswold do a nice job with the imported Italian twinkle lights?


In the words of a high school friend, here's our dinker tree. We're looking forward to a real tree next year, complete with Bert's set of trains from his great-grandpop running around it.


Santa came and left gifts, even though we flubbed up and forgot to put out cookies. Oops.


I don't know who was more interested, the cat or the kid.


Bert went to bed Christmas Eve in really cute Christmas pajamas. And then his diaper was soaked through by morning so this was Plan B on the Christmas pajamas/festive outfit for the day.


He's got the hang of this present thing.


The traditional Christmas orange, with a twist.


He's a little obsessed with his wooden "fut" and knife.


A potty from Santa!


Tractor book! Let's read!


Christmas morning breakfast of bacon bread pudding. Yes, you read that right. Recipe to follow.


All in all, a wonderful holiday spent with lots of the people we love. Bert got so many nice gifts; a big thank you to all of you! I can't even say he has a favorite because he has been playing with everything and enjoying them all.

Hope everyone had a wonderful holiday and best wishes for a happy New Year!

Friday, December 21, 2012

Oat Soak

Bert might look exactly like his daddy, but he got a few things from me. His love of books, his grumpiness when he doesn't get enough sleep, his sweet tooth, and his sensitive skin. It's nothing for him to break out in a rash from a scented product or to get a diaper rash when it gets humid. (I refer to it as the baby butt barometer, because as soon as humid weather is on the way, we are battling a diaper rash. He is more reliable than the weatherman.) With the cold, dry air of winter, Bert's skin is dry and itchy. Whenever I change his diaper, he starts scratching at the back of his legs, where the driest patches are. I don't know if it would officially be classified as eczema, but it has to be pretty similar.

We use the gentlest products we can find, and apply lotion several times a day and that seems to keep things under control. The other week I was looking for a bottle of bubble bath at the grocery store and noticed an oatmeal bath product for calming dry, itchy skin. I vaguely remember taking an oatmeal bath when I had chicken pox as a kid, so I figured I could give Bert an oatmeal bath without buying what seemed like a pricey product.

I did a quick search online and confirmed that it is pretty simple to make an oatmeal bath. You can use either regular or quick oats, and simply grind them to a powder using a coffee grinder, blender, or food processor. I filled the bowl of our coffee grinder and ground regular oats for about 25 seconds.


The sites I looked at recommended stirring about a tablespoon of the oat powder in a glass of warm water. If the water became milky looking, the oats were ground enough to release their colloid properties. (Check out this site for more about why it works.)


When I got Bert's bath ready that night, I used about a half cup of the oatmeal powder, mixing it the warm water and breaking up any clumps. Then it was just bath time as usual. Bert's legs and lower back always seem the driest, so he was able to get a good soak on those areas just sitting in the tub like he normally does. The sites also recommended skipping the soap when you do an oatmeal bath, so we just wiped him down and rinsed when he was done (and washed his hair like normal).


He seemed perfectly content to sit in his milky, cloudy bath and his skin did seem better so I think we will make this a regular thing through these dry winter months.


He is also a fan of oatmeal for breakfast, which may explain why he suddenly started sticking his face in the water during his oatmeal bath, when normally he has a conniption when water touches his head or face.


Tuesday, December 18, 2012

Pass the Pizzelle, Please

I'm sure I've said it before, but the part I love best about the holidays now is blending the traditions Keith and I grew up with, and making some new ones with Bert. When it comes to baking Christmas cookies, we each picked a few of our favorites to make: peanut butter kiss cookies (some people call them peanut butter blossoms), snowballs (or Russian teacakes), chocolate cream cheese cupcakes. And this year, we got to add one that is traditional for my family, and goes way back: pizzelle. They are a light, buttery, sugary, waffle-life cookie made on a special pizzelle iron.

Not having one of these irons, it would have been a little tough to carry on this Italian tradition. But this year for my birthday, my grandparents gave me one and I've been itching to make some since then. I guess I could have made them in the summer, but eating these snowflake-like cookies then just wouldn't have seemed right.

So, we waited until this weekend to pull out the pizzelle iron and make our first batch, using my grandpop's recipe.

Pizzelle

6 medium eggs
1 1/2 cups sugar
1/2 pound (2 sticks) butter, melted
3 cups flour
4 teaspoons baking powder
4 teaspoons anise extract (optional)

In a large mixing bowl, beat eggs, add sugar gradually, beat until smooth. Add cooled, melted butter. Stir in anise extract. (We used about 2 teaspoons of vanilla instead.) Stir together flour and baking powder; add to egg mixture and mix until smooth.

Heat pizzelle iron. Drop batter, about one tablespoon, in center of heated grid. Check for doneness after about 30 seconds (time will be particular to your iron!). Life with fork. Sprinkle with powdered sugar.

My grandpop advised having two people to do this: one to run the iron and move the pizzelle to a cookie sheet to cool, the other to sprinkle with powdered sugar and stack them in a can. They cool in seconds so it can be a pretty quick process. Especially if your brand-new pizzelle iron cooks them in under 15 seconds, not allowing you the anticipated 30 for sprinkling and stacking. It took us a little bit, but by the end we had a pretty good system going. It looked a little like this:


Our first  couple rounds on the iron got a little dark before we got the timing right. And by then, it was all hands on deck so I don't have any pictures of our more perfect pizzelle. No worries though, these taste just fine.


My grandparents even gave us a large coffee can, which is the perfect size for storing them. But you need two cans to hold a whole batch, so we found this plastic bucket to hold the rest. We've also been sharing them with some of the neighbors and they are a bit of a novelty around here.

We have an idea about making little ice cream cones with the pizzelle iron because you can roll the pizzelle when they are still warm, so we just might break it out in the summer after all.

Monday, December 17, 2012

Wipes for Wee Ones

Awhile back, I saw an idea for making a baby toy out of an empty wipe box and felt. I thought it was clever and would keep baby Bert busy, but I never got around to putting one together for him while he was small enough to be amused by it.

Fast forward about a year, and I was looking for an idea for a small Christmas gift for a friend's baby. I remembered the idea (which I think was originally in a Family Fun magazine, but I searched for it and couldn't find it so I'm not sure.) The original version didn't require any sewing, just folding the felt so that a baby could pull them out, much like actual wipes, but the thought of making my friend pick up and refold dozens of squares of fabric seemed a bit like torture for a busy mom. So here is my adapted version.

I started off with an empty wipe box, and cut a rectangle of card stock that fit nicely in the bottom to use as my pattern for the fabric.


Then I dug through my box of fabric, pulling out an assortment of colors, both of felt and regular cotton fabric. Using the card stock pattern, I traced rectangles on the fabric and cut them out with pinking shears to help prevent the edges from fraying. I just kept tracing and cutting until I had a stack that filled the box about three-quarters of the way.


Next, I ironed all the pieces and arranged them in a stack. I tried not to over-think the arrangement, but I wanted to mix the colors and have the pieces of felt distributed through the stack.


And another shot, just because I think it's pretty...


Finally, I sewed them together, alternating sides so that they would accordion-fold back into the box.


Here they are, placed in the box.


I pulled the first one through, and had Bert test it out to make sure they came through easily for little hands. Now that I've seen him do it, he might not be too old to be amused by this!


I think this could also be really cute with coordinating fabrics, or if you chose prints with animals, shapes, or other objects that you could point out to little kids as they pulled them out. But I like to think the random assortment has a certain charm too. And I love a project that validates my border-line hoarding tendencies.

Wednesday, December 12, 2012

Down to One

There are several debates that rage around pacifiers: whether to use them, when and how long to use them, and, maybe most of all, what to call them. When Bert was born, I was hesitant to start using one because I had heard if the baby was nursing, it could cause nipple confusion. (Never thought I'd use that word here.) Anyway, when the nurse offered us one right after he was born, I said no. And we held off for a couple weeks, reassured by our doctor that it was best to wait.

Well, by about three weeks in, Bert had the hang of nursing and we discovered he settled very quickly if we gave him one of our pinkies to suck on. Out came the pacifiers, and we never looked back. We also never called them anything but pacifiers. Well, we might have referred to it as the mute button a time or two. The silence was music to our ears. Bert slept better with them and was less fussy through the day.

At about the nine month mark, when Bert was starting to babble a lot more, Keith declared he didn't need them during the day anymore. My first thought was, "Sure, you aren't here with him all day. You don't have to listen to the whining." It only took about a week for him to get used to not having his pacifier, and he definitely started "talking" a lot more.

From that point on, pacifiers have been reserved for naps and bedtime. Every morning and after every nap, I say, "Those are for sleeping babies," and he hands them over. And yes, "them" as in multiple pacifiers. Bert likes to have two: one to suck on and one to play with. We found if he only had one, he was pulling it out and playing and wouldn't settle down so we started giving him two and it worked like a charm.

Bert has had a total of six pacifiers over his nearly 18-months. And now, through losing a few and chewing through two, we are down to one. (Although I know one is floating around my parents house, because we lost it there this past weekend.)

Bert has been informed that when this last one is lost or chewed up, there will be no more pacifiers. I have no idea if he understands or not, but that's the way it goes. I just wonder how many days of fitful naps and restless nights there will be until he gets used to being without one.

I guess the days of this little face are over...


Tuesday, December 4, 2012

A Good Trade

Awhile back, my friend Tawanda and I were talking. She was in need of a logo for her growing photography business, and I wanted some family portraits. So we did a trade: a logo and business card design and some help customizing her blog for a photo shoot and a disk of gorgeous family photos.

About a month ago, we headed out to a great spot Tawanda knew of, just in time to catch the last of the fall foliage. Bert was a little fussy and I was worried that we wouldn't have any good shots but Tawanda captured a lot of great ones. Having a little boy only a few months younger than Bert, she knew just how to get his attention and kept snapping away. And besides keeping Bert happy, she put Keith at ease since his big complaint about having photos done was that he didn't want to sit and be posed and have anyone call him "cupcake."

Here are a few of our favorites, though I'm not showing you our very favorites since they might be popping up in a few Christmas cards...


Tawanda's just getting going on her blog (tawandafayephotography.blogspot.com) so feel free to check it out and contact her through there if you are looking for a wedding, engagement, or family photographer.

Monday, December 3, 2012

A Picture is Worth...

Way back in the spring when we went to the zoo, we took a ton of photos of the animals. I had a bunch of them printed, thinking I would do something with them for Bert. Finally, I got my act together and pulled them out, along with a bunch of other assorted photos, to make a little photo book for Bert.


It's a pretty simple project, since all you need is:
• a small photo album (I found mine at the dollar store),
• an assortment of photos,
• some white labels,
• a marker,
• and about 20 minutes.

I started off by using a piece of colored paper and writing "Colter's Book of Words & Names" (that's right, his name is not really Bert in case you didn't catch that already) on it to cover up the original front, which said "Memories" or something.

Next I sifted through my box of photos for ones I wanted to include. I was just going to do the zoo animals, but thought it would be fun to include some everyday words (like sandbox and bath tub) and some faces of friends and family, especially those he doesn't get to see often.

Then I simply used a marker to write the words and names on labels, stuck them to the photos, and slid them in the album.


The album is only about two-thirds full, so we can add some more. I want to include some more friends and family as we get some photo cards this holiday season, as well as taking some photos of people to add.

Bert has flipped through the book, but I think I will keep it in my purse to amuse him on the occasions when we are stuck waiting in line or something and I need to keep him occupied. He loves to look at books with photos on his own, so hopefully this will do the trick. I've seen similar things done with photo books that can be ordered from places like Snapfish or Shutterfly, but I would be upset if I spent $20 or more and then he ripped it apart, so a $1 album and a random assortment of photos seemed like a better direction for Bert the Destroyer.

Thursday, November 29, 2012

Olive Love

Since the holidays, and all the gatherings they involve, are right around the corner, I thought I would share a simple hors d'oeuvre recipe Keith and I like. My mom has made it on numerous occasions, and I think it comes from an old Betty Crocker cookbook. File it under "not healthy for you at all."

Olive-Cheese Balls

2 cups shredded sharp natural cheddar cheese (you could probably use a milder cheese if you don't like the strong flavor of a sharp cheese)
1 1/4 cups flour
1/2 cup margarine or butter, melted
About 36 small pimento-stuffed olives

Mix cheese and flour; mix in margarine. (Work dough with hands if it seems dry)


Mold 1 teaspoon around each olive; shape into a ball.
Place 2 inches apart on ungreased cookie sheet.


Cover and refrigerate at least 1 hour.
Bake at 400, until set: 15-20 minutes.


I think next time I make these I might try mixing some herbs in the dough. Though we certainly haven't had any trouble eating them just as they are.

Tuesday, November 27, 2012

Snow Day

Considering Bert hadn't even started crawling by this time last year, there wasn't much of an opportunity to go out and play in the snow last winter. Now that he is most definitely on the go, some snowy fun is right up his alley.

The snow has been coming down steadily all morning, covering the grass and starting to stick to the street. I decided it was high time to suit him up and take him out to play. Stuffed into his boots and snow pants, he had a hard time walking and when he fell over, he would just lay there until I picked him up. Sometimes he would catch himself with his hands but couldn't push himself back up because he couldn't bend his knees, so he just hung out there, saying, "Up," until I helped him out. We built a Bert-sized snowman, traipsed around for a bit, and then came back in.


The only thing missing was a cup of hot chocolate when we came inside. Well, missing for Bert. I had one.

Related Posts Plugin for WordPress, Blogger...