Showing posts with label Big Projects. Show all posts

Tuesday, November 25, 2014

Stoned

I must have been to think I should do this project. Nah, that couldn’t be it. Maybe just crazy or stupid, likely both.

A few years ago, Tara and I hired a friend of a friend who does masonry work to lay an (approximately) 450 square foot, 4” thick concrete pad. (By the way, if you are local and need concrete or masonry work done, contact Eric Hansen. He does great work!) We were very pleased with his price, timeliness and quality. 

With kids, it’s tough to find the time to get to a landscaping and stone place (together), look around, ask questions and make decisions. Okay, maybe I was just procrastinating but the thing about the kids is still entirely true. Anyway, 525 square feet of flagstone was delivered in August. Sand, lime and cement followed but I wasn’t home during delivery so, despite my request, the lime and cement ended up in the yard. More on why that’s an unfortunate error later.


Research (online or in person at landscaping and stone businesses) was useless as every piece of information I found seemed to be conflicting or vague. Thankfully, I was able to speak with Eric, whose expertise proved invaluable.

I started with a test patch so I could get comfortable mixing concrete and laying stone. This also allowed Tara and I to try several different widths of grout lines. We settled on ¾” but the largest tile spacers I could find were 3/8”. Thankfully, my friend Jamie was able to cut about 100 wooden pieces to use as spacers.   

The official day 1 was in late August and Jamie came by to help me get started. About half the day was spent taking measurements, marking chalk lines, hanging string lines, and other general planning stuff. Then we started laying stones.  


Here’s the basic process:
  1.  Mix dry materials together (2 parts sand, 1 part lime, 1 part cement).
  2.  Clean the dirt off the stones. Chip away any loose pieces so the mortar adheres better.
  3. Paint underside of stones and top of patio with bonding agent. 
  4. Add water and bonding agent to dry concrete mix and mix to a pasty consistency. 
  5. Spread mortar onto patio. Make sure to press it into all the crevices. You want about 1” of mortar under the stones.
  6.  Back butter the stone. Again, make sure to press it into all the crevices.
  7. Lay stone and make sure it’s square to surrounding stones (work into corners if you can so that you always have two stones to square it against). Insert spacers.
  8. Pound stone into mortar with rubber mallet. Don’t go too far or you’ll have to pull the stone out and start over (a pain in the ass, trust me).
  9.  Use a level to ensure the stone has the proper pitch (you don’t want it level or water will pool).
  10. Use a level or other straight edge to make sure the top of the stone is level with all surrounding stones.
  11. Allow mortar to cure a bit and then scrape out excess mortar around the stones. You want the mortar to come up the edge of the stone about 1/8” – ¼” now. You’ll fill the rest in later.
  12.  Clean any mortar off the top of the stones. Be gentle if the mortar hasn’t cured or you’ll move the stone.
  13. Repeat until you’re tired, bloody, sweaty and generally grumpy.
Want some of that in photos?


Jamie came back to help when I was ready to begin doing the grout lines. Tara and I decided on a gray (charcoal) color for the grout. I found that I preferred using a grout bag to squeeze the mortar into the joints. At this point, it was all-hands-on-deck and no stopping for taking photos.


I mostly worked on the patio on weekends and vacation days (I’m thankful I had them). I was able to lay an average of 12 - 15 stones per day (there are a lot of steps – it’s a long process). In August and September, many days were in the 80s and 90s. By the end (I finished on November 16th), many days barely got above freezing and because the days were short, I often worked in the dark. 


So, now that the patio is finished, it’s too cold to use it. But I think it looks nice, though I am definitely biased. There is still some work required to finish the last set of stairs, provide some sort of shade and do some landscaping around the patio. But that’s for next summer. Right now, I’m just glad to be done before Thanksgiving.

Final numbers:
3 months
300 flagstones
2 tons of sand
1 ton of cement
½ ton of lime (weight is not equal to volume across each product)
4 gallons of bonding agent
30 ounces of coloring
2 diamond blades (neither of which could cut through a soft cheese now)
7 rolls of painters tape
Approximately 100 wheelbarrows of concrete (each hand mixed twice, once dry, once wet)
I’m not going to tally the hours because it’ll make me sad.


Challenges: (The whole project but a couple of things in particular)
  •  Poorly cut stones: It was as if every stone was cut by hand, in the dark. For example, I had stones that were supposed to be 12” x 18” but were actually 11¾” on one end and 12¼” on the other.  A half inch difference over 18”? How does that happen and how do I make that square?  Some cheating here and there may have occurred.
  •  Chunky lime and cement: Because the pallets were set in the yard and did not have any plastic under them, ground moisture caused the bottom bags to get chunky. This meant either throwing out nearly $200 worth of materials or building a box with a screen that I could sift the materials through. I opted for the latter but that added significant amounts of time and effort to the project. 
Tips: (in case you feel crazy enough to attempt a similar project, though I don’t recommend it)
  • (Keith) Buy decent quality flagstone and ensure that the stones are cut evenly. 
  • (Eric) Painters tape for the grout lines.
  • (Eric) When you splatter a bit of mortar on a stone, it’s best to clean it off immediately. If that’s not possible, you can let it harden a little, then scrap it off and clean with a wet sponge.
  • (Eric) Don’t put the mortar or grout right up against a house, staircase or anything else that might shift or settle. That will cause the attached mortar/grout to break apart. Use something that’s about 1/8” wide, smooth and slick to put up against the wall of the house or staircase to keep the mortar/grout away from the wall. Fill it in with a caulk backing rod and caulk once the mortar/grout cure. I used cheap poster board (the kind with the Styrofoam stuff in the middle) with petroleum jelly spread on it so it wouldn’t stick to the mortar/grout. Just make sure to wait for a good cure before pulling out the poster board or you’ll pull the mortar apart (again, trust me).
  •  (Tara) Make a pattern on paper first. Tara created one on the computer so she could just move stones around at will, without actually moving stones.  We found out very quickly that even a random pattern is like a giant, horrible puzzle and requires some planning in order to make everything fit together.                             
  • (Keith) After using it for a day, I felt a cement mixer was more trouble than it was worth.  It really only made sense for batches that were larger than I could lay by myself before it started to cure and it required cleaning after every batch, which added time.
  • (Keith) Only clean the dirt off the underside of each stone. Leaving the dirt on the top means any splatters of mortar are easier to clean off and are less likely to stain the stone.


Acknowledgements: (I hardly know where to start)

Thank you, Jamie, for the use of so many tools, for getting me access to Eric’s expertise, for hauling a cement mixer, for cutting spacers and for generously giving at least two days of your life to help with the project.

Thank you, Eric, for taking the time to provide tips and secrets and for allowing me to use your cement mixer that first day. This project would have turned out very differently if not for your expertise.

Thank you, Terry and Mom-mom, for watching the boys on numerous occasions so that I could focus on the project and so that Tara could help. I would still be working if not for you.

Thank you, Jimmy, for the use of so many tools, including an extra wheelbarrow that enabled me to keep one batch of dry mix at the ready. I’m happy I got to put your father’s wheelbarrow to good use again.

Thank you, OT, for devoting a day of your life to helping with mixing and laying stone. One day may not seem like a lot but every little bit contributed to the final product.

Thank you, Colter, who, despite being only 3, was always eager to lend a little hand. True, sometimes you stepped on stones you weren’t supposed too and caused some extra work, but I love working with and teaching you. Someday, you, Elliott and I will make a great team (of course by then you’ll probably balk at the mention of helping your dad).

Last, but certainly not least, thank you Tara. I appreciate that you were so willing to step in and do whatever was necessary to help; clean stones, paint bonding agent, dry mix, prepare meals, keep me hydrated and, probably most importantly, watch the boys. It doesn’t get done without you and I think we make a pretty darn good team. I’ll meet you on the patio next spring to enjoy the fruits of our labor.

I’m sure I’m missing people and for that I apologize. I appreciate everyone’s efforts more than I can say.


I'll end with one final thought: never again.


Friday, August 23, 2013

One Step at a Time

After more than a year (maybe even more than two, I'm losing all track of time) of dithering, waffling, and run-of-the-mill indecision, we finally took care of this minor disaster:


Our back steps were cracked and deteriorating, and Bert had a great love of pulling chunks out and putting them back in, like a puzzle.

There were rust problems around the railing.


And they had been held together by a few boards for quite awhile now.


We went back and forth on what to do, from steps constructed out of large rocks, to a small wooden deck and steps, to pre-formed concrete steps, to having concrete poured on site, to pouring concrete ourselves. You see, some champion dithering going on.

The ultimate plan is to cover the patio in flagstone (we were hoping to do it this fall but with Baby 2 arriving in T - 6 weeks, I'm guessing not). So we decided to rule out the deck idea. The large rock plan was the next to go, because we figured it was just a bit too rustic for our Cape Cod-ish house. So that left us with some sort of concrete steps, which we decided we would cover with flagstone to match the patio.

First we called a local pre-form company. The price of the steps alone was about $1100, plus we would have to have demo the existing steps and have footers placed before they would deliver the steps. Next option please.

In the midst of all this, a sidewalk around the corner from us was being replaced. After spending a good part of a morning sitting on the curb across the street with Bert, watching the concrete truck pour the sidewalk and the crew scurry around smoothing and shaping, I suggested to Keith that we get a quote from that company. So we did. And we liked their price for not only pouring new steps, but demoing the old ones, removing the debris, and expanding the small set of steps that go from the patio to the lower part of the sidewalk that runs through our yard.


We got a price on a Friday, and by the following Wednesday the site looked like this:


It took a crew of four men about 3 hours to demo the steps, dig out the area for expanding the lower steps, and place all the forms.

My big job was putting this sign on the back door so I didn't throw my pregnant, forgetful self down into the pit.


On Friday morning at 7:30, much to Bert's delight, the "mixer truck" pulled up. He even had to take his little mixer truck out while he watched.


Within about 40 minutes, they were off to pour at another site, returning a few hours later to put some finishing touches on the steps.


We were able to walk on the steps the next day and couldn't be happier with them. We opted to have holes left to add a railing of our own, though they could have provided one. Note to self: ask Daddy to build railing. In the meantime, those patio chairs are meant to keep Bert from taking a tumble off the side.


Now the lower steps are the same width as the back steps, and we plan to run flagstone across the tops of them as well to make them look a bit more seamless. In an ideal world, we would cover the whole sidewalk with flagstone but that is probably a bit beyond the budget at the present time. Right now, it is just nice to have wide steps to go down, especially when carrying wash to the clothes line or bringing in groceries. It felt like we were walking a tight rope before.


And Bert has a big dirt pile to play in, which he has been dragging his Tonka dump truck and digger to daily. Such a dirt ball.


Seriously, the added benefit of entertainment for Bert made having a professional do this job seem like an even better decision. Bert hung out on his stool at the back window pretty much the whole time they tore out the steps, even while they used the jackhammer. He was enthralled the whole time the truck was here and watching the crew run back and forth with wheelbarrows full of wet concrete and pour them in the forms.  He asked Saturday morning if the men would be back to do their work. Lucky for him, after our neighbor saw what a good job the crew did, he had them replace a section of his sidewalk on Wednesday so Bert had a second round of entertainment.

We are kicking ourselves that we didn't have this done sooner, and are happy with our decision to let a pro do it versus trying to do it ourselves. I can't even imagine the logistics of us doing it, with how long the steps would be torn apart and what we would have done with all the debris and what we would have spent on materials to build a form. Yep, making our only part of the job signing the check was the right call on this one!

Thursday, May 23, 2013

Windows to the World

Well, maybe windows to our world would be more accurate.

In an earlier post, I wrote about how we planned on replacing the windows of our laundry/mudroom was our big-budget project for the year. It was going to be the project for last year, but we ended up needing to replace the roof, so we waited until this year after we had saved up a bit more to tackle the windows.

We had a local company quote the job last summer, and were blown away by how much they wanted to replace five windows and the back door, and add a storm door. Early this spring, we got a quote from Lowe's and felt much more comfortable with their price (and the products were comparable) so we went with them. Besides a little mix-up with the install dates, everything went very smoothly.

So we went from a heavily-used room with windows that didn't have screen, blinds brittle with age, no storm door, and being able to see daylight between the door and door frame, 


...to new, bright white capping outside...


 ...and a new, much more secure and better insulated door and storm door...


...and five brand-new windows with screens.


We are thrilled that we were able to get windows with the same grids as we had before, which match the rest of the house. It cost a little extra, but we were also able to keep the transom above the door which we love because the front door and the door between the kitchen and laundry both have them as well. If you are passing by the house, everything looks consistent and true to the original style. 

It has already made such a difference on these warm days to be able to open up the windows in the back and get a breeze moving through the house. And we are looking forward to losing the draftiness we dealt with through the winters from this room.

We still have plenty to do to get this room to where we want it to be, which means freshened up and more functional. I already bought this bench cushion for a storage bench I'm going to get Keith to build (are you reading this, dear?). The room desperately needs to be painted, so this cushion also works as a jumping off point for picking a paint color.


The shelf (you can see it in some of the photos above) needs some more organized storage baskets (and I think I've got that wrapped up so I'll post a picture as soon as I have them in hand and organize things.) The washer has gotten very noisy lately, so we are going to swap out the old washer and dryer that were here when we moved in for the pair we have in the basement from when we were renters. A stacking washer and dryer would be ideal in the long run to free up more floor space, but we aren't rushing into that purchase since we have another working set. We would also like to put a new floor down, but it can wait a bit. Mostly, we noticed how easy it was to move around back there when we cleared things out for the window guys, and want to deal with the storage issues first. And blinds. Since  the back of the house faces west, it gets all the afternoon sun so we do need to get blinds for all five windows (we did get a door with built-in blinds) and get them up. But painting first! Keith, what were you planning for the weekend? (As if I could make a decision on paint color that quickly...)

And if you are wondering what happened to our turtle, Cash, who used to reside back here, he has a new home in the chemistry classroom of the school where my aunt teaches. We were happy to find someone who wanted him and was willing to give him a good home. And Keith was relieved Cash wasn't going to become the specimen for a biology class dissection.

Thursday, September 20, 2012

The Roof Over Our Heads

When we bought our house, we expected to make some repairs and do some renovating. It is, after all, nearly 90 years old. We've puttered along, doing mostly small, cosmetic things, usually doing them on our own and only occasionally calling a professional in (plumbing, tree removal, and concrete pouring were left to the pros).

Then one rainy morning awhile back, I went into my closet to get dressed for work and found that water was coming through the roof and into my closet. Eventually, the plaster got so waterlogged it came right off the lath, leaving a soggy mess in the back corner.


 We hemmed and hawed about what to do. Our roof was made of aluminum shingles, so it wasn't as simple as having someone come and fix a leak. The structure was such that they weren't even supposed to be walked on. We had a roofer come by and look at it. He admitted he didn't know how those roofs went together but was nice enough to try caulking a few places. We thought we were good. 

A few rain storms came and went, and for the most part, things were ok. No leaks, no problems. Just when we thought we were in the clear, we would get one nasty, windy storm and the water would be coming in my closet again.

We started looking for companies that deal with this kind of roof. We tracked down the company that bought out the manufacturer of these shingles, and asked them for names of local contractors that work with their products. The two closest ones were still over an hour away and after numerous calls, it was pretty clear they were not at all interested in repairing a roof they hadn't installed. 

So, we finally came to the conclusion that our best option was to have a new roof put on. We weren't particularly happy about it; it seemed that we shouldn't need a whole new roof for one leak. But we got a couple quotes, chose a company, signed a check and got it done. 

On Monday, they came and took final measurements.

On Tuesday, a big truck with a forklift crane came and plopped shingles up on the roof. Bert was a big fan of watching the crane.


On Wednesday, three men scurried up the ladders and got to work.


It was nice to see those shingles go.


The roofers were great about covering up the garden beds to protect them and picking up after themselves.


They really kept at it too; on day one, I only heard them break for about twenty minutes. Thursday, they were down for a little while with an air compressor problem. Friday, they were done and out of here by a little after 1:00.


It was loud in the house as they pulled off the old shingles and scraped off the tar paper underneath. Then their nail guns made quite a racket too. For three days, Bert didn't nap until after they left. Three long, noisy days of keeping Bert happy without a nap (we did head to the park and to a friend's house on two of the mornings). 

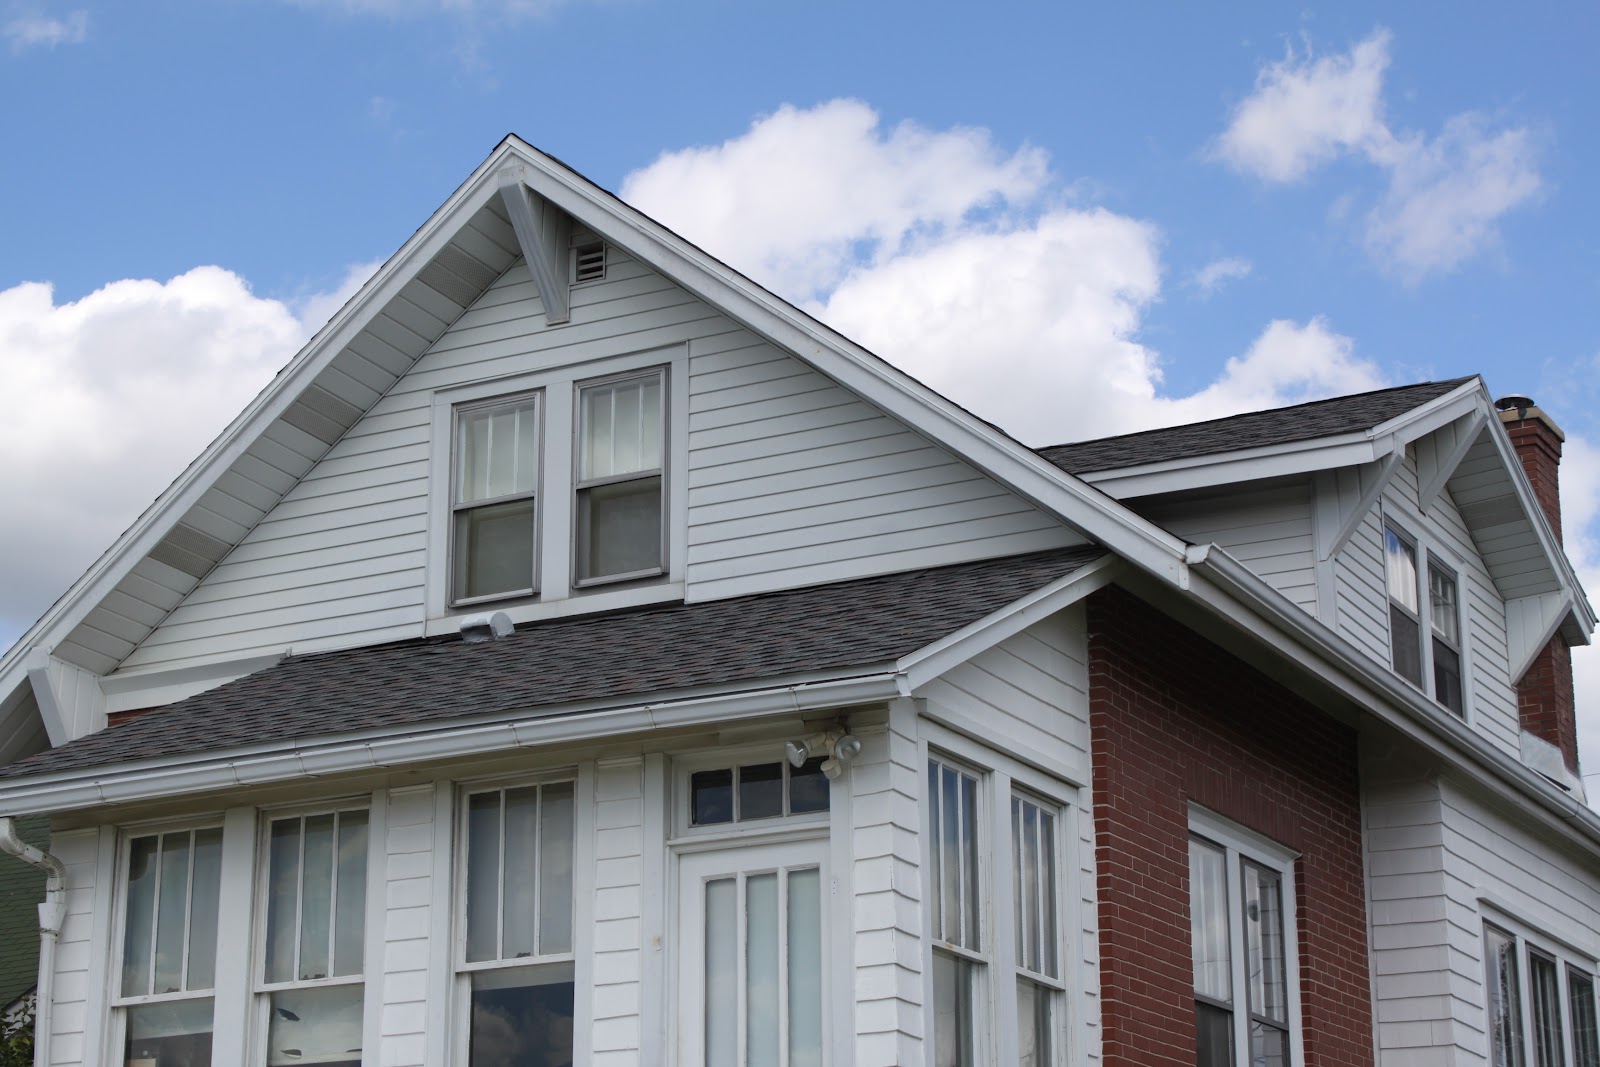
Now it's all done, and it looks great. (They are coming back to do a little touch up work on the flashing around the chimney.) The front and back porches used to have different shingles than the main roof, and now they all match so that's an added bonus of having a new roof. We are really happy with the color, which has a little red to it, thought it is hard to see in these photos.


And the biggest perk? We had several inches of rain and lots of wind earlier this week and my closet is completely dry.
Related Posts Plugin for WordPress, Blogger...