Showing posts with label Buy Local. Show all posts

Thursday, August 23, 2012

Milkin' It

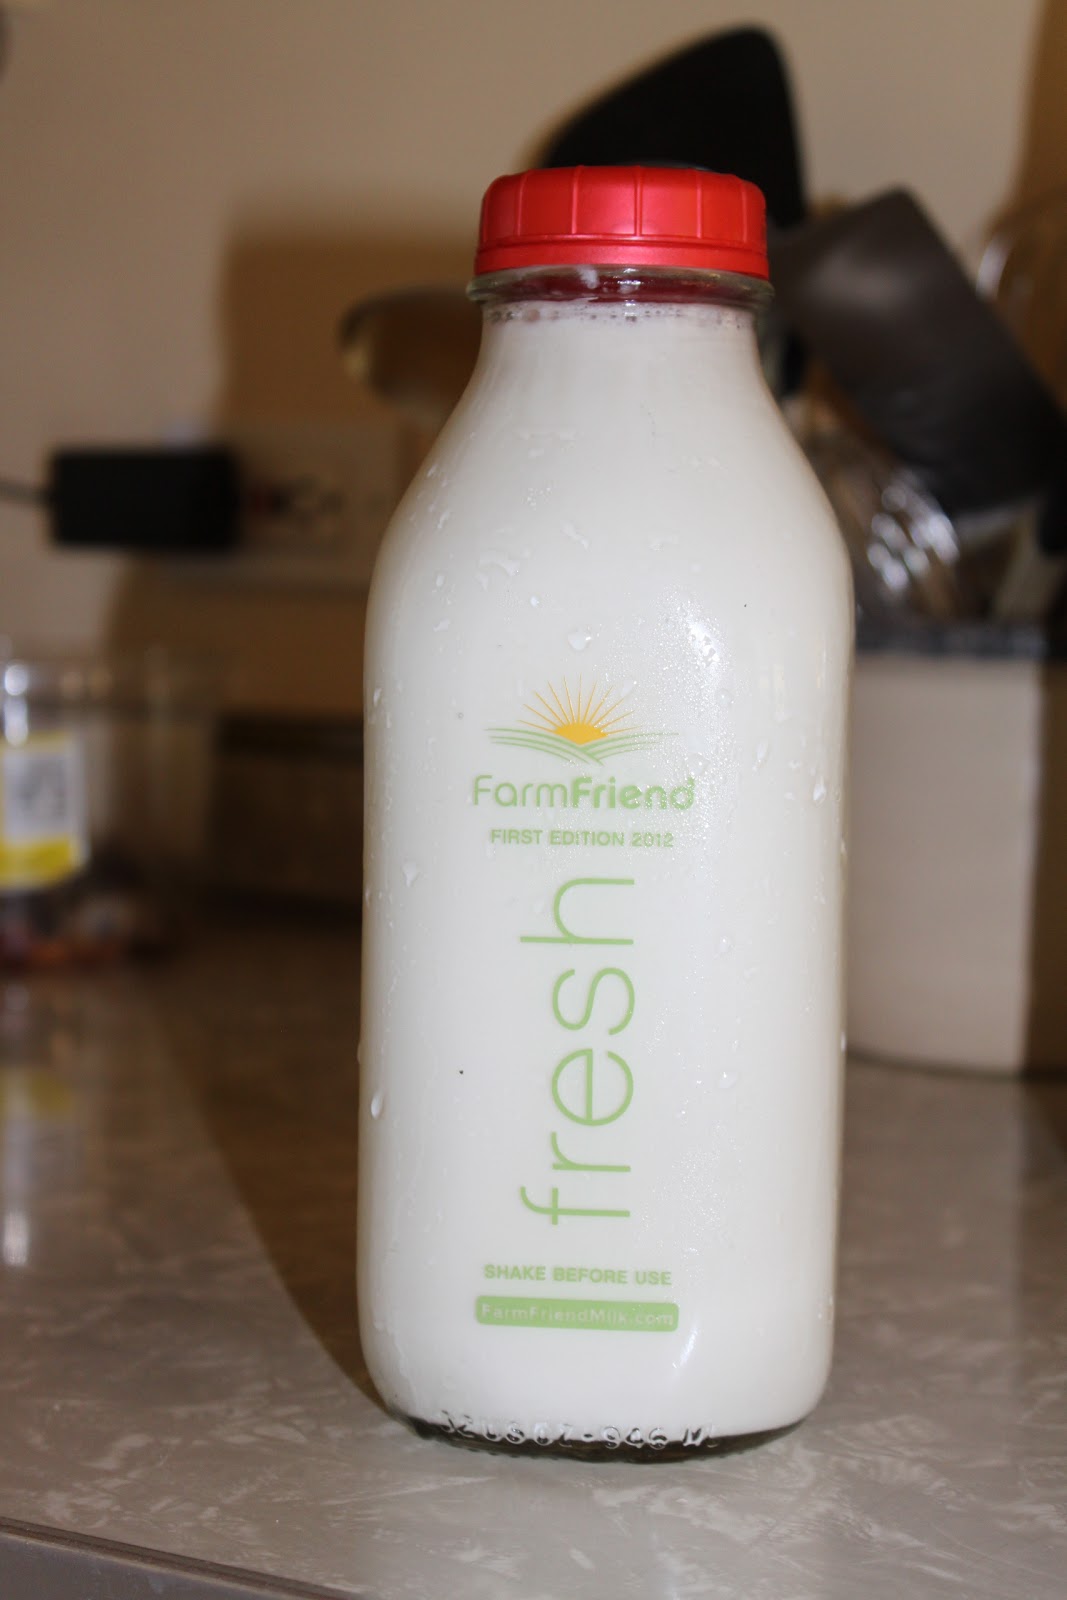
Now that Bert drinks whole milk morning and night, we've been going through it pretty quickly. We had been buying organic milk at the grocery store, but recently the doughnut shop here in town started carrying local milk in glass bottles. An initial, one-time, $2 deposit is required on the bottle, and then we just return the empty one each time we go back. We get whole milk for Bert, and skim for us about once a week. Most of the time, we walk up to get it so it's exercise too! The milk is from local, grass-fed cows, not treated with hormones or antibiotics. It's pasteurized and homogenized which is good, because I just can't get into the raw milk deal. I love that it comes in reusable glass bottles since the organic milk we had been buying was in cartons that we can't recycle in our area. They carry both half-gallons and quarts (usually we get a half-gallon for Bert and a quart for us and that lasts us about a week).


If you had any reservations about how good this milk is, let Bert demonstrate his fondness for it:


(Here is the link if it isn't working right on the blog here: click here.)

And in case you are wondering, no, I don't buy doughnuts every time we get milk. Even though Bert points and jabbers enthusiastically. He must think I'm a pushover like his daddy (who does buy doughnuts when he is sent to get the milk).

Thursday, July 26, 2012

As Local as It Gets

Can I just say I am really excited about, and a little proud of, this meal? This one, right here.


It wasn't anything difficult, and there weren't any exotic ingredients. What made me so excited is that it was all home-grown or local food going into it. We grew the potatoes, carrots, and rosemary; our friends gave us the zucchini they grew, and the chicken was locally-raised bought at the farmers' market. I guess the olive oil, mustard, salt, and pepper weren't so local, but I think that can be excused. We also had some of our sweet corn with dinner.

The recipe was touted as a make-and-freeze meal to be cooked later, but why would I freeze it when we could enjoy it fresh? Although if I were overrun with vegetables, it would be handy to mix up a batch and freeze it to enjoy later. Here's the recipe as it was printed.

Rosemary Chicken with Zucchini
Real Simple from a couple years ago

Buy It
1 pound new potatoes
2 carrots
2 small zucchini (I used one large)
Olive oil
Whole-grain mustard (we had spicy brown in the fridge so that's what I used)
1 bunch rosemary
Kosher salt and pepper
4 6-ounce boneless, skinless chicken breasts
4 1-quart resealable plastic freezer bags

Freeze It
Quarter the potatoes. Peel the carrots. Cut the carrots and zucchini into 2-inch stick. Mix them in a bowl with 2 tablespoons olive oil, 2 tablespoons mustard, 1 tablespoon rosemary, 1/2 teaspoon salt, and 1/4 teaspoon pepper. Season the chicken with 1 teaspoon salt and 1/4 teaspoon pepper. Divide everything among the 4 bags. Freeze, until ready to cook, for up to 3 months.

Cook It
Heat oven to 400 degrees. Remove the bags from the freezer (you'll need one bag for each serving). Empty the contents of the bags into a baking dish. Roast for 25 minutes. Toss the vegetables, turn the chicken, and continue roasting until the chicken is cooked through, 20 to 25 minutes more. Divide among individual plates.

Like I said, I didn't freeze it so mine went right from prep to a 9x13" glass baking dish. I just laid the chicken on top of the vegetables and the roasting time ended up being about the same. We all loved the vegetables done this way; even Bert scarfed them down. I might use this process again just to make vegetables for a side. When I go for seconds on veggies, you know the recipe is a keeper.

Tuesday, June 26, 2012

We're Diggin' It

Remember when we showed you the pictures of our mini porch makeover? And we said one of our long(er)-range goals was to use plants to add some more color and curb appeal? Well, we decided to just jump on it. We were motivated by an assortment of plants from my mom and one of Keith's co-workers. Since we didn't have a place to plant them without getting to work on the front flower bed, it seemed like we should just get moving. Plus, I think Keith was itching for a project.

Keith started by digging up the sod in the area to the left of the porch and a small area to the right. The left side is a shoe-in for a flower bed, since it is completely contained by sidewalk. Without thinking about it much, I thought we would just focus our energy there, but Keith suggested cutting out a bed on the right side to balance things out. Turns out, that was a pretty good idea.


While Keith cut sod and loaded it into the wheelbarrow, I took it around the side of the house and piled it up. We laid it grass-side down, hoping to kill off the grass and then have a pile of nice soil we can add back into the garden or use in another raised bed next spring.


After all that, we had a dirt pit flower bed that looked, um, less than flowery. We had our couple hand-me-down plants in the ground, but that was it.


As luck would have it, a few days later we got a coupon for a local garden center (the same one where we got the flowers for the hanging baskets) in the mail. We decided to head over one evening when Keith got home from work and pick out some perennials that would be of varying heights and colors and do well in an area that is shaded for a good part of the day.

The next day, Bert and I planted all of our new plants. I wish I had taken some photos of that, because Bert was filthy. But between trying to get plants in the ground and keeping the little man out of the street, I didn't even think of the camera. Every time I dug a hole, Bert came over and sat next to it and put his feet in. He also sat on several plants and tipped the watering can over twice. Needless to say, he was a mess and the project took much longer than I anticipated. But he had fun and all the work still got done. 

I wanted to add a little patch of mint somewhere on the quarter-acre, but was concerned about it spreading too much. Keith came up with a plan to use our old fire pit to create a mint patch, which will hopefully keep it somewhat contained. He dug out a hole and and placed the basin from the fire pit inside, after drilling holes in the bottom for drainage. Then he lined the basin with stones. The plan is to fill it with potting soil and plant some mint in there that my mom is bringing next time she comes to visit.


We also used the stand from the fire pit (originally the basin sat on top of it) as a little fence for the mint patch. I think it adds some dimension to the flower bed and ties in with the porch railing (even though we don't really like the railing).


And as you can tell from the picture above, we added mulch. Ok, Keith added mulch. Bert and I sat on the porch and watched. That's how most things get done around here these days.

We still have some things to do, like plant the mint. I also want to add some lavender, which my mom is bringing too.


The right side still looks especially empty, with only one little plant near the sidewalk, which you can't even see in this picture. Our plan is to put some tall ornamental grasses along the side of the porch. Closer to the sidewalk, we want to create rock feature (I suppose that's what a landscaper would call it),  by which I mean a nicely arranged pile of rocks with hens-and-chicks and maybe some other succulents tucked in the crevices. We saw one at the garden center and thought it was really cool.


Things certainly are not finished, but I think in a couple weeks the plants will fill out more and make it look great. We are also keeping our eyes open for rocks for the rock feature and maybe pavers or some other kind of rock to use as edging, especially on the right side where we want to keep the grass from creeping in. We'll hold out for another coupon or deep fall discounts to get the ornamental grasses. Since becoming a one-income household, we have definitely slowed down on projects. But by keeping our eyes open for coupons, hunting down deals like the wicker furniture from Goodwill, and using plants that friends and family members separated from their own flower beds, we have been able to spruce up the front of our house. We have also come to accept that these projects don't have to all happen in the course of one weekend (remember I found the wicker back before Easter?) That helps us to really think through our plans and to spread out the cost of our projects. So for about $200, we now have a house that we feel, in the words of Nate Berkus, rises up to greet us. Or at least it lifts it's head and nods a hello.

Wednesday, May 30, 2012

Pretty as a Porch

We love our house, but we'll be the first to admit that it is lacking some curb appeal. Case in point, take a look at the photo below.


Rest assured, we do not typically keep a ladder leaning against the house. Keith was checking out the roof, trying to pinpoint where a leak might have originated. At any rate, the porch looks really drab. Granted, this photo was taken in March before anything started to green up but I can't say that had typically looked any better the rest of the year.

Back just before Easter, I took a drive out to Goodwill one weekend afternoon while Keith stayed home with Bert. I had decided I wanted a wicker rocker for the porch, and was casually hunting for one. Imagine my delight when I stumbled across a wicker chair and love seat for, get this, $15. That's $15 for the pair. I just wish I hadn't been shopping by myself so that I could have shared my giddy delight with someone else. I grabbed those tags and practically skipped up to the counter to pay for them. The girl asked if I would be taking them home that day or picking them up later and I told her I thought I could fit them in my car. A very nice (and patient) man working at Goodwill helped me finagle them in, and off I went. I really should have taken a picture of them crammed in my car. 

The furniture was white, and I initially thought I wanted to paint it a bright, funky color to really liven things up out front. But after living with it for several weeks and finding some cushions we liked, Keith and I both decided that they should stay white. But they were a little chipped up and worn looking, so we decided to put a fresh coat of paint on them. Keith got to work hosing them off and scrubbing them down, just to get rid of any loose paint and dust.


After they dried in the sun for a few hours, we moved them to the garage, setting them on some old cardboard. When Bert went down for his nap, we each grabbed a can of spray paint and started painting.


Four cans of paint and two coats later, they looked fresh and new. Well, almost new. You can find a few places where the wicker is broken off but they don't look dingy anymore.


While Keith was scrubbing, Bert and I were working on some hanging baskets. We had found three metal hanging baskets at a yard sale for $5, then picked up the coconut fiber liners and some flowers at a local garden center.


We put some petunias and portulaca in the hanging baskets, and some marigolds, begonias, and some sort of "spike" in large pots for the top and bottom of the steps. Bert was a big help, as always. Now the trick will be for me to keep things watered because that's where I usually come up short on potted plants.


With the hanging baskets, pots, new furniture. and a fun outdoor rug made out of recycled plastic we found last fall, and the cushions we came across at Big Lots, things are looking brighter and more inviting.


We are spending a lot more time sitting out front in the evenings, when it is the shadiest, coolest place to relax, and Bert likes to play out there in the afternoons. The minnow bucket from the flea market a few months ago sits next to the love seat and holds a few toys that can stay outside.


I would still like to find a new welcome mat and a little table to have a place to set drinks and such, and I am considering painting the mailbox a bright color. We also have an old metal milk can to the right of the door (you can see it in the very first picture) that I might paint too, though Keith is grumbling about that because when it came to us from a relative he spent a long time sanding it down and painting it tan, per my request. Those things might still happen this summer, but in the long range, we would like to put in different posts and railings, something a little more architectural. We are also tossing around ideas about what to plant in the grassy patch to the left and front of the porch to add more color. Things may change down the road but at least now our porch is saying, "Hello! How are you today?" instead of, "Does anybody live here?"

Sunday, May 13, 2012

Pillow Talk

I'm not sure why, but lately I've been enamored with silhouettes. Maybe because they seem so classic and timeless, I have been itching to capture Bert's profile with one. I played around and did a small one out of paper in a tiny frame I had laying around, and it was ok. But it didn't quite cut it for me.

Then I was checking out this blog and saw these adorable pillows. I thought, "Hey, I can do that!" Then I thought, "Hey, that would be great for my mom for Mother's Day!" It was a pretty simple project. The hardest part was actually getting out of the house and to the fabric store (which is just sad, because the local Mennonite fabric store is less than five minutes away) and choosing two, and only two, fabrics. Because had I had more cash in my wallet, I might have gone on a fabric binge. If only I sewed more, I might be able to rationalize loads and loads of pretty fabric. Alas, I settled only a quarter-yard of each of two fabrics, a yellow and a blue, to match the guest room (my old bedroom) at my parents' house.

I started off by opening a photo of Bert in profile in Illustrator, making an outline of it, and printing it out. You could trace or freehand a profile too. I'm pretty sure that my kindergarten teacher sat us in front of the light from an overhead projector and traced our shadows. But Bert doesn't sit still so that was out.

Since I had already ironed my fusible interfacing onto the fabric I wanted to use for the silhouette, I had to transfer Bert's profile. I took a soft pencil, traced over the outline, flipped it over onto the fusible interfacing, and rubbed it on. If I hadn't already ironed the fabric on, I probably could have just traced the silhouette through the interfacing.


I decided I wanted a roughly 8" square pillow, so I cut two 9" squares of my yellow background fabric (making them the right size for a 1/2" seam). Then I cut out the silhouette and ironed it to one of the squares.


Then I pinned the squares together, right sides in, and sewed it, leaving about three inches open to stuff the pillow.


Before turning it right-side-out, I clipped the corners so they would be nice and neat when I turned it. Then I turned it, and ironed it one more time.


Then it got stuffed. Since it is just a decorative pillow, I didn't worry about getting a pillow form and making a removable, and therefore washable, pillow cover.


Once it was stuffed to capacity (and I really filled it so that it would be nice and plump, just like Bert in real life), I hand-stitched the opening. And now Bert's face is on a pillow.


I almost wish Bert had a brother or sister so I could have made a sweet little pair of these with two kiddos facing each other. But if there were two kids running around here, the chances of me getting any kind of project done, let alone two of something, would be slim. Really slim.

Friday, December 30, 2011

Water Works

One of things about owning a house that was built in 1923 is that it requires care. The faucet in our shower had been leaking for weeks. Well, I won't lie, months. I have been a little slow with the repairs. The leak started slow; maybe a drop every few hours. But, it grew progressively worse until it was a steady drip, drip, drip.

Now, if you're like most people I speak with you're thinking, "Big deal. Water is cheap and besides, how much water can a small leak really waste anyway?" Well, according to the U.S. Geological Survey, sixty (60) drips per minute (which is what I estimate our faucet was leaking) amounts to approximately 5 U.S. gallons per day. True, water is cheap in terms of dollars and cents but, what's the impact on the planet? And, for those of you who don't enjoy the occasional hugging of a tree, if the leaky faucet is dripping hot water, it will drive up your costs to heat that water very quickly.

I knew all this already because a big part of my job is providing energy efficiency and conservation information to people on a daily basis. So, why did I wait so long to fix the leak? Good question. I can sum it up in one word; fear. Fear of making the problem worse and having to pay a plumber $150 just to show up, another $50 for the hour it would take to fix the leak and another $50 for the hour he would sit around and BS. So, I starting by taking the typical homeowner approach: I nurtured the hope that the leak would fix itself. It didn't – stupid leak.

I finally decided that I would face my fears and do the repairs myself. Replacing some washers can't be that hard right? Right, it wasn't hard. Even better, it was cheap!

I began by consulting the Reader's Digest Complete Do It Yourself Manual as well as a YouTube video (sign of the times). I shut off the water to the entire house. (In case you're wondering, I had planned to shut off only the water to the shower faucet until I realized that our house did not come equipped with shut offs at each faucet – remember, 1923).

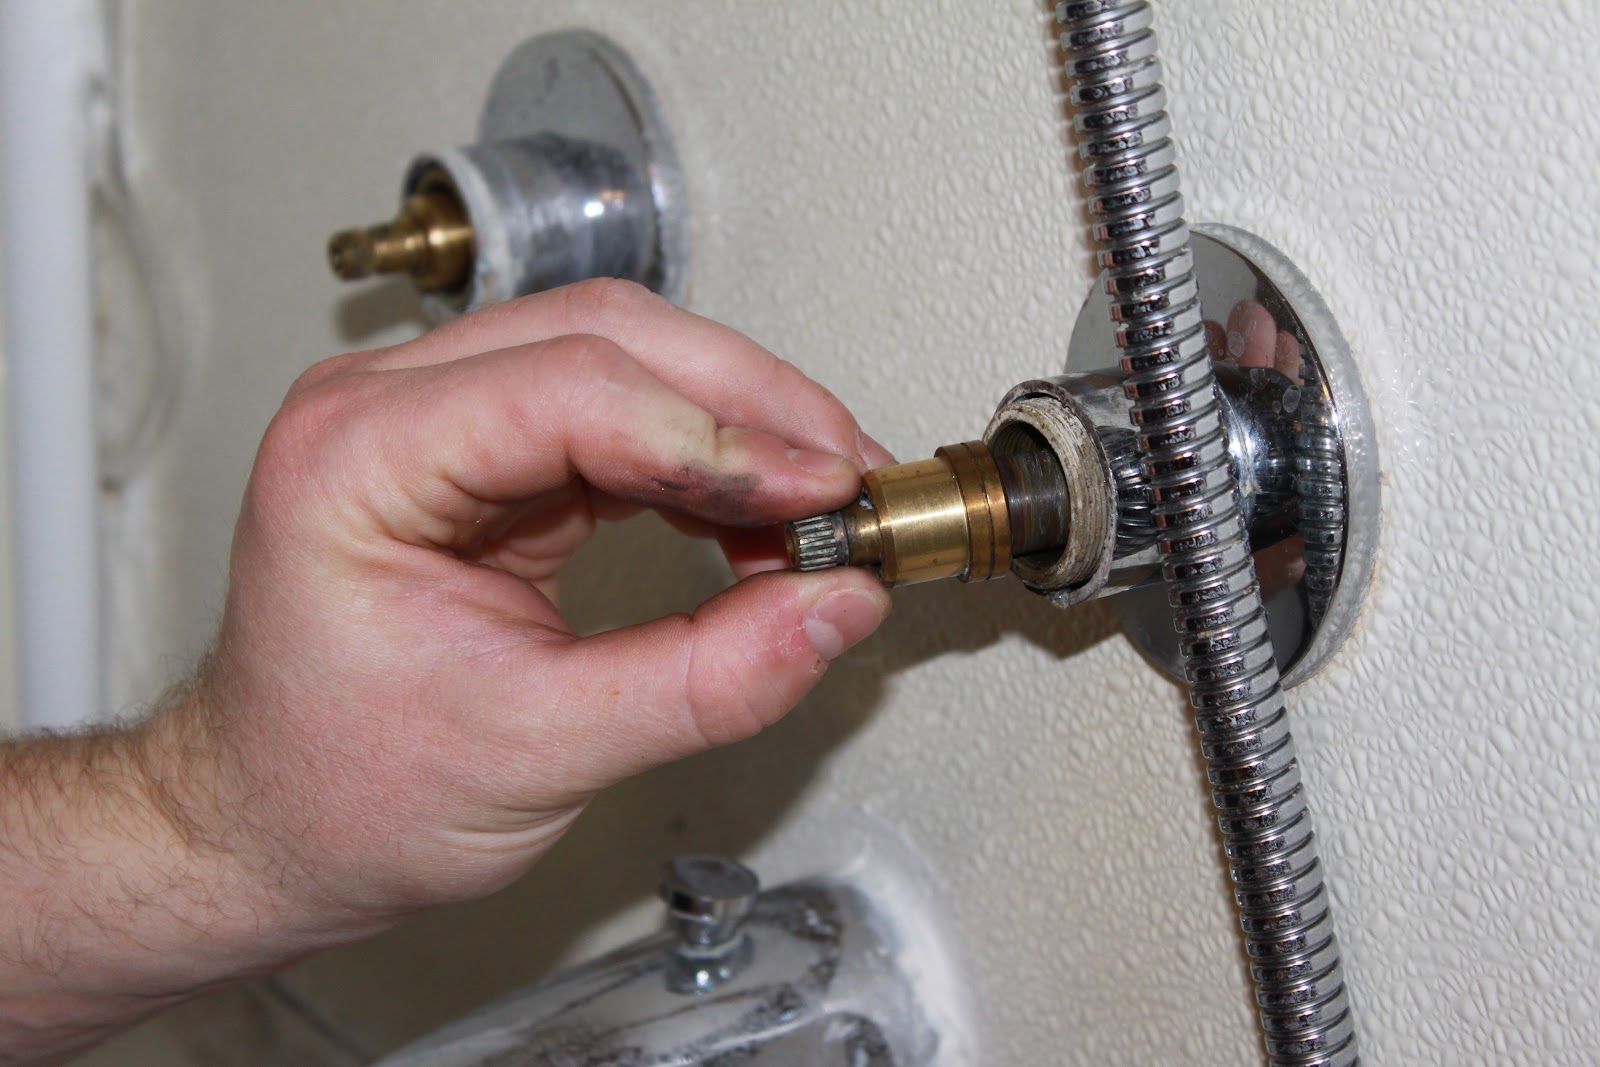
Next step, remove hot and cold knobs. Both the book and the video said that once the screw is removed, the knob should just pull off. After removing the screws, I tried pulling the knobs off. I pulled and pulled and... nothing. I thought this was going to be the end of the entire project. But, like any normal man does when something doesn't work they way it should, I whacked it a few times with the wrench and, no kidding, it worked. Apparently, the knobs had been so corroded after 30 or so years of very hard municipal water, that they were stuck in place. Back on track.


I then removed the hexagonal nut.


Next, I pulled out the cartridge (I made that up because I don't really know what it's called and, honestly, I don't care – I got the job done regardless) and removed any damaged washers.


That ended up being all of them. As a matter of fact, one of the washers on the hot faucet was missing completely. This was long overdue. I had bought a pack of various sized washers so I had plenty. Finally (or so I thought), I reassembled everything and turned the water back on. Surprise, surprise, it continued leaking. Back to the basement to shut the water off again.

When I had everything apart the first time, I noticed that both o-rings looked like they had seen better days. I thought I could get away with recycling them - mostly because I didn't want to make another trip to the local hardware store for new ones. Oh well.

I took everything apart a second time and replaced the o-rings. Reassembled everything a second time and turned the water back on. Guess what? Nothing. No more drips. No more money going down the drain. Well, at least not due to the leak.

What I was worried might cost us a couple hundred dollars ended up costing about $1.50; especially since we walked to the hardware store (the first time). Good deal. I should have done this a while ago... lesson learned.

Tuesday, December 13, 2011

Souper Simple

I am a soup fan. My mom is a soup fan. Keith is on the fence. So with my mom's visit over the weekend, soup was on the menu and I had a new recipe I wanted to try and it didn't disappoint. It's a keeper and even Keith agrees. I think it appeals to Keith because 1) it is very thick and hearty, more like a chili or stew than a broth-y soup, and 2) it has beer in it.

Beer-Braised Pork and Black Bean Soup
Real Simple, October or November 2011 (I think)


2 12-ounce bottles of beer (preferably lager)
1 tablespoon chopped canned chipotle chilies in adobo sauce, plus 1 tablespoon adobo sauce
   (I found these in the Latin cooking section of the grocery store, not with the salsa and tortillas)
1 teaspoon ground cumin
1 large onion, chopped
1 pound dried black beans, rinsed
1 1/2 pounds boneless pork butt (pork shoulder)
1/2 cup sour cream
1/2 cup salsa
1/4 fresh cilantro

In the bowl of a slow cooker, combine the beer, 3 cups water, the chilies, adobo sauce, cumin, onion, beans, pork, and 1 1/2 teaspoons salt. Set the slow cooker to high and cook, covered, until the beans are tender and the pork pulls apart easily, 4 hours. (I set mine on low for 8 hours and that worked fine.) Using a fork, separate the pork into large pieces. Divide among individual bowls and top with the sour cream, salsa, and cilantro.


It isn't the prettiest meal I have ever made, but it tasted good and you can't beat a one-pot slow cooker meal! I also made a batch of these oatmeal rolls to eat with it. And though we are soup lovers, I think my mom and I could have just made a dinner out of the fresh rolls spread with butter. Maybe man cannot live on bread alone, but I know a few women that can.


We used a stout beer from our local microbrewery and the soup kept some serious beer flavor which might not be as evident with a lager. The chipotle chilies and adobo sauce really turned the heat up (think buffalo chicken-level heat) so I think next time I will try just a can of green chilies to get a bit of the bite but less heat. We used a lot more than 1/2 cup of sour cream because it helped to mellow out the spiciness.

Keith and I ate some of the leftovers Sunday night for dinner, putting it on tortilla chips with some sour cream, cheese, and salsa and eating them like nachos and that was great too. We froze the rest to eat later. Simple, hearty, and tasty. Definitely a keeper.

Wednesday, October 19, 2011

The Diaper Diaries: Part 3

Tales of the Dastardly Dryer

It is another rainy day here on the quarter-acre so I thought it would be the perfect opportunity to share a little laundry number crunching with you. More specifically, the cost of running the clothes dryer. I really try to avoid using the dryer at all, opting to hang diapers, clothes, towels, sheets, everything out on the line as much as possible. A typical week includes four or five loads of laundry: two loads of diapers, one of dark clothes, one of light clothes, and towels or sheets. Since we've been getting a lot of rain lately, two of those loads usually end up in the dryer. It got me wondering: how much does it really cost to run our dryer? Our almond-bisque colored Frigidaire dryer, circa 1980, that came with the house?

Lucky for me, this is the kind of stuff Keith does at work so he whipped out a calculator and used this equation to give us an idea how much our dryer costs us each month:

Watts = Amps x Volts
(This information can be found on a tag attached to any electrical appliance).

kWh = (Watts x hours of use) / 1000
You are billed by your electric company for kilowatt hours (kWh). A kilowatt hour is equal to 1000 watts of electricity used for one hour (i.e. Ten-100 watt light bulbs used for one hour).


Cost = kWh x price/kWh (price/kWh can be found on your electric bill)

*This is a basic equation that can be used for any electrical appliance in your home and will provide you with an rough cost to operate an appliance. Calculators can also be found on many websites to help ease the pain for those math-haters out there. Keep in mind, this equation does not account for variations in usage which all appliances have; such as those that use larger amounts of energy at start up than during normal operation.

He based his numbers on two loads a week, totaling 3 hours of drying time, for a four-week month, or eight loads a month. The cost came to $12.79 a month, or about $1.60 per load. That's a serious chunk of change in my (pocket)book. If we didn't utilize the clothes line at all, we would be looking at $25-35 tacked on to our utility bill each month. Ouch!

Our disclaimer here is, as I mentioned, that our dryer is old. We often have to run more than a full cycle, especially if it's diapers we are drying. That's why we calculated each load at an hour and a half. Which got us thinking a little more: we have another, newer dryer in the basement that moved here with us. Would it do any better? Keith was back to the calculator in a flash, only to find that the newer dryer uses more watts, so even if the dry-time were a little shorter, we probably wouldn't be coming out any better. Not too surprising, since all electric dryers tend to use a similar amount of energy - this is the reason Energy Star does not rate clothes dryers.

At any rate, the calculation on the clothesline is pretty simple:
clothesline + wet clothes + sunshine + breeze = free


People are always talking about how they would love to use solar energy in their homes but it's too expensive. A clothesline has to have the biggest return on investment of any solar array.

And here is where we get back on the cloth diaper track. Besides the clothesline making the whole diapering escapade cheaper, the diapers actually end up cleaner. When the diapers come out of the wash, even though they are clean, they tend to have some stains from the poop. If you throw them in the dryer, then you just end up with dried stains. Out on the clothesline, the sun bleaches them out. Not just lightens them. Completely bleaches them away. It is my favorite magic trick, especially since you shouldn't use bleach on diapers because it can be harsh on babies' skin. So diapering is cleaner, cheaper, and greener on the clothesline. Oh how it makes me smile.

As far as washing the diapers, we are still using our homemade laundry soap (we are now on our second batch) and run a cold rinse cycle first and then a hot wash/cold rinse cycle with soap. 

Last note on the diapers has to do with diaper cream, or the lack thereof. We had started off using Desitin as needed with the liners, like I mentioned in an earlier post. Then we stopped using the liners. The Desitin was washing out ok, but there was still some residue. I knew there were a few other babies in cloth diapers at the library story time we go to, so I asked what they use. Then I asked their moms because the babies weren't much help. The answer? Lanolin. Pure lanolin. So we picked some up at the health food store (I think you can get it at drug stores too) and have been using it ever since. It seems to do the trick for Bert's bottom, and washes completely out of the diapers. I believe that's what they call a win-win situation. Oh, and it doesn't cost any more than a tube of diaper cream. Win-win-win. And it's all natural. Win-win-never mind, you get it.

Cloth diapers and lanolin,
approved by Bert's bum

Tuesday, August 30, 2011

More Than I Bargained For


A few years ago, Tara and I bought a used truck.  At the time, we each only had small cars.  Tara's was a ‘91 Toyota Celica with barely enough room for people and I had a ‘99 Saturn, which we still own.  Oh what an advanced piece of technology.  While most vehicles are rated based on horse power, I believe mine has about 90 mouse power.  Yeah, that's right, it couldn't pull Bert's Radio Flyer wagon if someone got behind and pushed.
 
The truck has served us well.  But, like any vehicle, it needs some TLC every now and then.  Right now, the truck needs new wheels and tires.  The tire treads are low and the steel wheels are deteriorating; causing constant flats.  Luckily, we have an air compressor, courtesy of my father-in-law (thanks by the way).  But, filling tires every time I want to use the truck gets old and, although we plan to “drive it until the wheels fall off”, I would prefer if the wheels didn’t actually fall off. 
 
My mechanic told me he no longer deals with used wheels or tires and I wasn’t about to put new wheels or tires on a truck with over 140,000 miles.  So, I decided to go to one of those U-Pull-It places.  How hard could it be?  I've changed tires before.  Besides, when I called and said what I was looking for (15" steel or aluminum wheels with decent tires) they said that they had some, already pulled and ready to go.  Of course, me being the trusting type, I believed them.  Yeah…
 
So, I went to the front office (a busted up trailer) and told them who I was.  Of course, the person I had spoken with was not working that day.  Picture three large men; missing teeth, long beards, bandanas and old trucker hats, cigarettes hanging out of their mouths and seemingly speaking in only four letter words - all looking at me like I had three heads.  Don't get me wrong, I don't have anything against any of them and it's not like I am always the poster child for proper English.  It was just a little intimidating is all.
 
Finally, one of them found a Post-It note with my information and said, "You were looking for 14" wheels, right?"  Ummm, no.  So, he offered to drive me around the yard to find other wheels and/or tires I could use.  Now, apparently, they experience a lot of theft.  (Just as an aside, if you're going to risk getting arrested for stealing, might as well steal new parts, eh?!)  Anyway, this guy gets a call from the office saying they saw people hopping the fence on a security camera and this guy needs to go confront them.  Wouldn’t you know it; he decides to take me along for the ride.  Joy.  Now, I don't condone stealing, but I certainly hadn't planned to confront the type of individuals who do.  I just came for the wheels.  Thankfully, we never found anyone.  Oh look at that, I said "we", as if I was helping him look.
 
Finally, we found 4 wheels that were still in good shape with two good tires.  Of course, the day I picked to get these wheels was the same day Irene came to greet us.  Again, joy.  In my defense, I didn't think it would matter since I was told they already had the wheels ready to go.  So, there I am, standing in the pouring rain, soaked to the bone, taking the wheels off of a truck that's balancing on a wet fork lift, four feet off the ground, on a muddy hill, unsteady at best.  This is why people pay mechanics.
 
I should mention that the fork lift operator was great.  Once it began to really pour, he carried the truck over to his trailer and got out an air wrench for me to use.  He even removed the two bad tires - something that wouldn't normally seem like much but I left out the part where he only had one arm.  No joking, one arm. And, he did it all with a smile.  I was impressed and he got a tip.
 
Four hours later, I got four steel wheels and two good tires for a bargain compared to what a shop would have charged. 
 
So that's my first junk yard experience.  Good times.  I might consider paying someone else next time.  Or, I could always fill the Saturn with whatever heavy supplies I need and call AAA to come tow it to my house.  Nope, pay someone else, definitely.

Sunday, March 13, 2011

Doughnut Make My Brown Eyes Blue

Yesterday morning was some errand running, all within town. Dollar store, our little soap boutique for more hand soap, the flower and gift shop for a lawn ornament, and the highlight of our weekend (drumroll please): the new doughnut shop in town! The Frying Dutchman just opened this week, much to our delight, and is fantastic. They sell freshly made cake doughnuts individually, by the half dozen, or by the dozen. They have a menu of sorts with suggested topping combinations, or you can make up your own, and they put the toppings on while you wait. Being fresh on the doughnut bar scene, we took home a six-pack of their suggestions. Oh, and it's mix and match so every one of our doughnuts was different.

We thought we would be getting an eye roll from the girl doing the toppings but she was actually really excited to have such a variety. We came home and made a pot of coffee and pretty much had doughnuts for lunch.


Just in case your mouth isn't watering yet, here's a few more shots of our doughnuts.


Sadly, the photos are all we have left now, but if you come to visit us, we will take you to The Frying Dutchman. If we come to see you, there is a strongly possibility The Frying Dutchman will come along too.

Side note: the owner told us they are considering starting a happy hour, with a doughnut or cookie and coffee special in the afternoons. Bert and I just may be regulars.
Related Posts Plugin for WordPress, Blogger...